
REVIEW: Arcam FMJ AVR390 and FMJ P429
Arcam continues to expand its product set in the high-end home theatre market. Stephen Dawson roadtests the FMJ AVR390 receiver and FMJ P429 power amplifier.
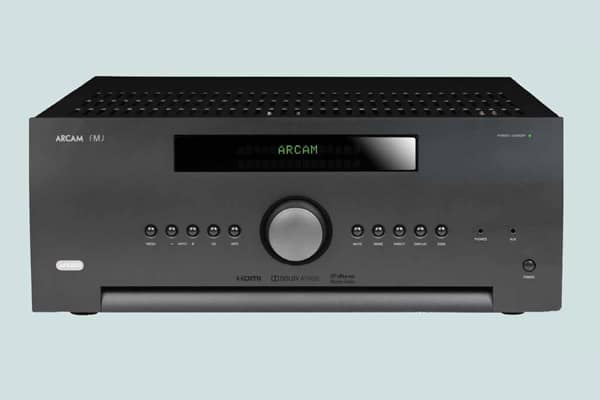
Several months ago we reviewed the FMJ AVR850 home theatre receiver from UK high-end maker, Arcam. That was a seven channel unit, so for Dolby Atmos it was limited to 5.1.2 channels. However it supported the full Atmos Monty – 7.1.4 – if you were to add four more power amplifier channels. To explore that, the distributor supplied us that receiver’s little sibling, the FMJ AVR390, and the four channel FMJ P429 power amplifier.
ADVERTISEMENT
What is it?
There’s something quite unusual about Arcam. Just about every company that has several models of home theatre receiver puts more power and more features in the more expensive units, fewer of both in the less expensive ones. But as far as I could work out, the only difference between the AVR850 and the AVR390 was the amplifier. The feature set was exactly the same.
That feature set includes full Dolby Atmos decoding (there are pre-amplifier outputs for all channels), DTS-X decoding, UltraHD signal handling and network audio streaming including support for Spotify connect.
And automatic room and speaker calibration and EQ by Dirac, a highly respected system that is rather more complicated to use than most.
There are seven HDMI inputs and two outputs, plus an additional HDMI output for a second zone. There are no analogue video inputs or outputs. A few line level analogue inputs are provided along with optical and coaxial digital audio – four of the latter – and Ethernet for the network functions. Full 11.2 channel pre-amp outputs are available and seven pairs of outputs. Finally there are also plenty of system integration connections.
There’s also a DAB+/FM tuner built in.
Where it differs from the AVR850 is in the seven built-in amplifiers. Rather than being G Class, they are regular A/B class with a lower maximum outputs: 80W per channel, both channels driven. The manual seems to indicate a minimum of eight ohm loudspeaker loads are required.
One pair of amplifiers are flexible: they can be assigned to surround rear (the default), to a second Zone, to a set of height speakers or to bi-amplify the front stereo speakers. That means that you’ll be using add-on amplifiers to power the height channels or rear surround channels.
That’s what the P429 power amplifier was for. It packs amplifiers which are more highly specified than those in the receiver. They’ll deliver 90W each, all four channels driven, into 8Ω, or 125W each into 4Ω. If for some reason you only need two channels, you can bridge pairs to bump them up to 270 watts per channel into 8Ω (no support for 4Ω in this mode).
Setting Up
It somehow felt not quite right using the P429 amplifier channels for height or rear surround. Based on technical specs, on the cost per channel and on Arcam’s evident pride in its Class G amplifiers, it would have been nice to deploy a pair of these amps to the front where their virtues could be more fully appreciated.
And you can do that if you’re okay with 7.1.2 channels (ie. two height only) or 5.1.4 (ie. no surround back). Because all the receiver’s channels have pre-amplifier outputs, you can leave a couple of the built in channels unused. That’s actually what I did because I don’t use surround rear channels in the office. But with more flexible channel re-directions available in the setup menu, then a full 7.1.4 Atmos system would be possible with the better amp used for the front.
So my setup was two P429 channels for the front left and right (with the receivers’ two matching channels laying fallow), the receivers amps for centre and surround left and right and the front ceiling speakers, and the other pair of channels on the P429 for the rear ceiling speakers. I used a short link cable between the trigger output of the receiver and the trigger input of the power amp so that the latter would switch on automatically.
The Dirac system involves using the supplied microphone and USB pre-amp plugged into a Mac or Windows computer which is running the calibration software you download from the Arcam website. A kind of wizard guides you through the process, but before doing that you should set the speaker sizes. It doesn’t do any of that.
Be prepared to spend a bit of time on it. You can fiddle with target EQ curves and all kinds of stuff. Impressively, it also takes on the task of EQing the subwoofer, something that many systems don’t attempt. Of course there are separate settings for each pair of speakers. When you’re finished, your computer will perform the many calculations required and then download the resulting adjustments into the receiver over the network.
For this test I had the receiver sitting between, in signal terms, the Oppo UDP-203 (AU) UltraHD Blu-ray player and the BenQ X12000 UltraHD front projector.
Performance
I watched several movies in UltraHD and played a great deal of music using the system. The video handling was excellent. It doesn’t do any scaling and so on, it’s just video in, video out. With an overlay so that when you adjust the volume level or change the listening mode a message appears on your TV showing this. That’s the case even with UltraHD video.
But it was the sound that Arcam is all about, and that’s also what these two units were also all about. Now one might naively think that 80W per channel is a little on the low side, but in fact that’s just one decibel in output level less than a 100W. Three less than 160W.
In practice, this receiver and the attached power amplifier had all the power required for thunderous levels (remember, nine loudspeakers plus subwoofer all working at once!) Whatever the various amplifier limits, I came nowhere near reaching them.
The sound field with Dolby Atmos movies was in many cases incredible. For all the movie’s flaws, whoever engineered the sound on Suicide Squad did an Oscar-worthy job, and my nine speakers driven by this system placed everything with precision in an acoustic hemisphere all the way around me, with great precision and perfect timing.
Even movies without explicitly defined height channels but fine sound, like Atonement or The Edge of Tomorrow, often had some implicit height content which Dolby Surround processing extracted and fed to the overhead speakers, adding both a literal and an emotional dimension to the performance.
The receiver was just as good with music, and to be fair I auditioned it both in the way I originally set it up, and again using the AVR390’s own amplifiers for the front stereo speakers. In both cases superb control was exercised over the speakers. This is the kind of home theatre receiver that challenges high end stereo equipment on its own turf.
The network audio functions show on-screen information, although it must be said that the display is rather … basic. Just some text in box with, where appropriate, a logo. It’s practical enough, but is unlikely to impress one’s friends unless they have a bent for the minimalist.
The Spotify Connect functionality was fine, apart from that basic display, working smoothly and sounding absolutely first class. The unit also works as a DLNA renderer, which is to say that you can send music to the receiver over the network using a DNLA player. In theory you can navigate through DLNA-served menus using the on screen interface with the receiver’s own remote control, but it didn’t like the menu structure served up by my Synology NAS and wouldn’t go deep enough into the organisational hierarchy to actually read any music. So I used BubbleUPnP on Android to serve up music to the renderer. There did not appear to be any Arcam-branded software to perform the same function in the Play Store, but it turns out there are apps in the Apple App Store. I gave Arcam MusicLife – a network music manager – and Arcam Control – a network-based remote control – a go. Both of them worked well. (MusicLife, for what it’s worth, isn’t tied to Arcam products. It’ll feed network audio to any DLNA renderer.)
But with neither BubbleUPnP nor Arcam MusicLife would the receiver play run-on music without gaps between tracks. Nor would it play any high resolution music supplied over the network. The upper limit was 48kHz rendering.
Conclusion
I don’t think Arcam would dispute my view that these products straddle the ground between home theatre and high-end stereo. Yes, you can go cheaper for more on-the-spec-sheet performance and even more features, but very little will surpass the Arcam FMJ AVR390 receiver and the FMJ P429 power amplifier where it counts, in sound quality.
-
ADVERTISEMENT
-
ADVERTISEMENT
-
ADVERTISEMENT
-
ADVERTISEMENT